
Who else’s nails are looking a little rough these days from not being able to visit the salon? I had dip powder on my nails on a regular basis. It adds a layer of hardened powder coat on my real nails and therefore helps them from breaking in the dry winter. But my previous dip powder grew out and I need a fresh mani bad.
Lucky for me, I found this kit that I can do my own dip powder nails at home. And I’m shock at how easy it is to do. And my nails look amazing, just like if I go to a salon.
Hover on any image in this post to pin and save for later


So if you’re interested in trying out dip powder at home, here is how I do it using this kit! The kit comes with 6 colors, and I’m using 010 – Follow Your Heart in this tutorial.
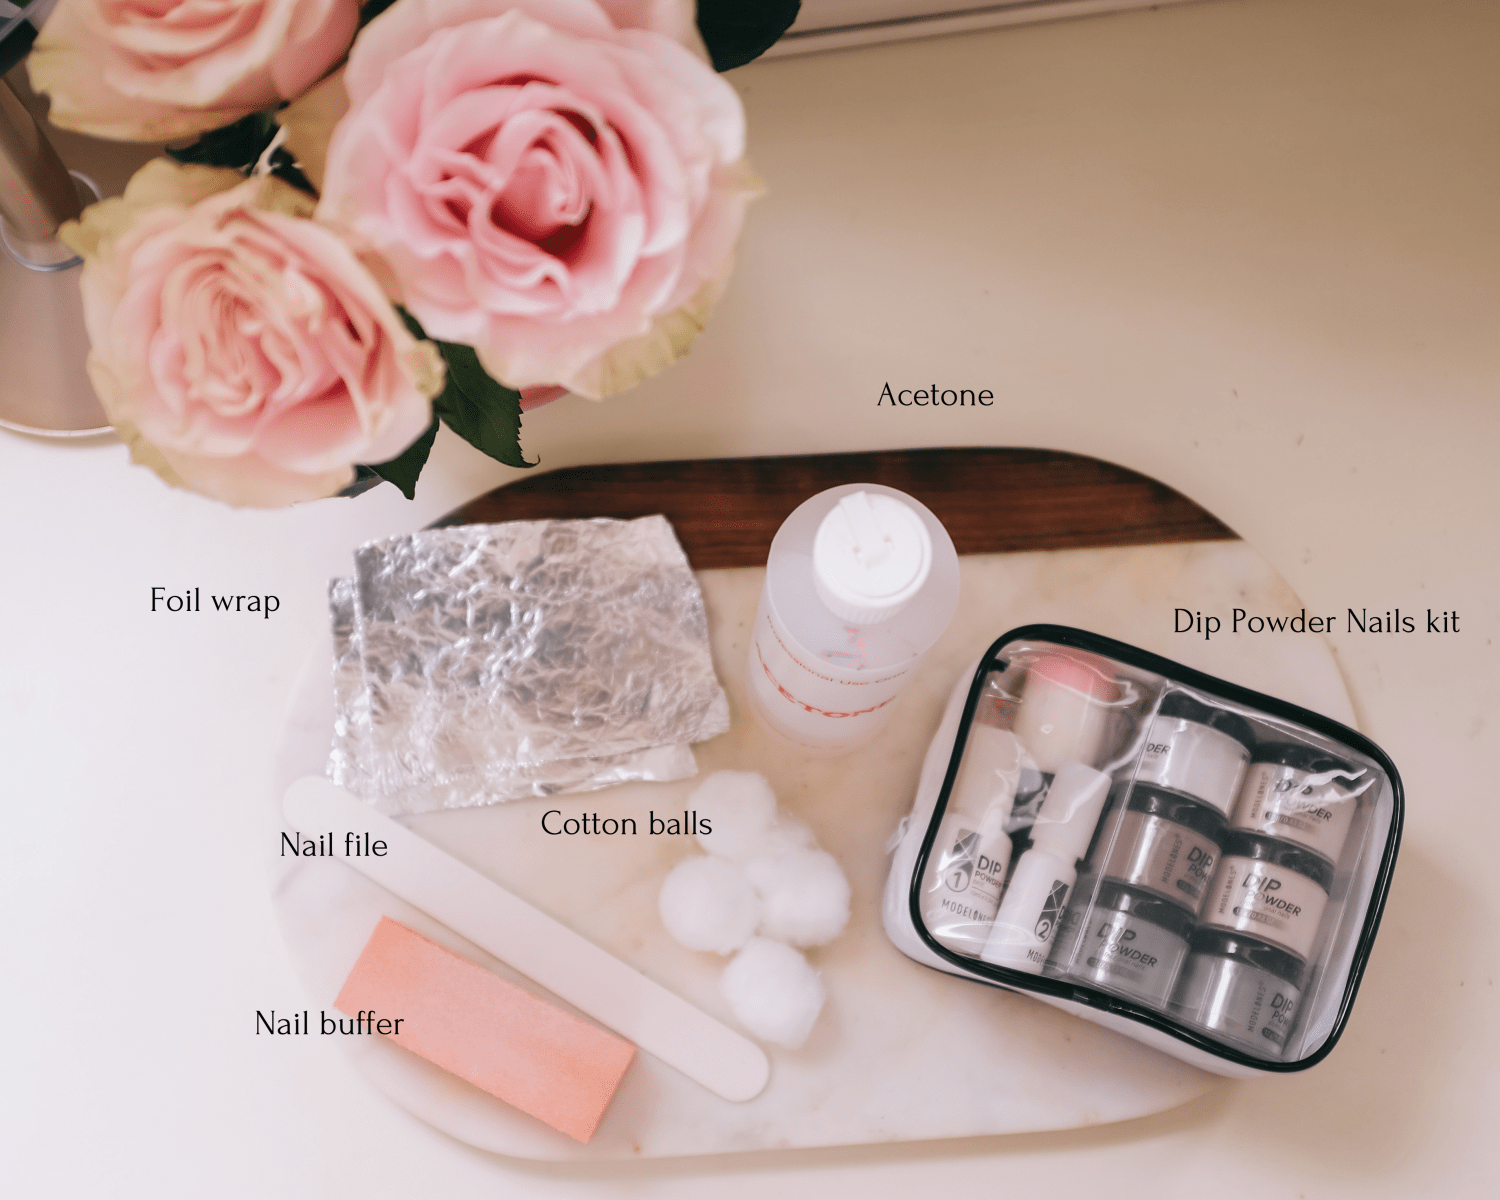
Things you need:
- Nail file
- Nail buffer
- Dip powder kit, which should include: a base coat, an activator, a top coat, and of course a color dip powder of choice.
- Optional (to take off your previous dip or gel nails): acetone, some wrapping foil (you can cute some foil squares from the kitchen) and a few cotton balls.
Click to shop nail tools:

Click to shop dip powder nails kits:
If you need to take off your previous dip or gel nails, please see how-to at the bottom. Here, I am going to assume you start with clean nails and no previous gel or dip on them.
Note: Since I already did my nails to test as soon as I received the kit in the mail but didn’t take photos, my nails were already done. So I took off 2 fingers, my point and middle fingers to show you this tutorial.
1. Prep: Cut/Shape nails to your liking

2. Prep: Buff your bare nails to remove natural oil to help the powder stay on your nails.

Now wash your hands and we’re ready to start dipping!
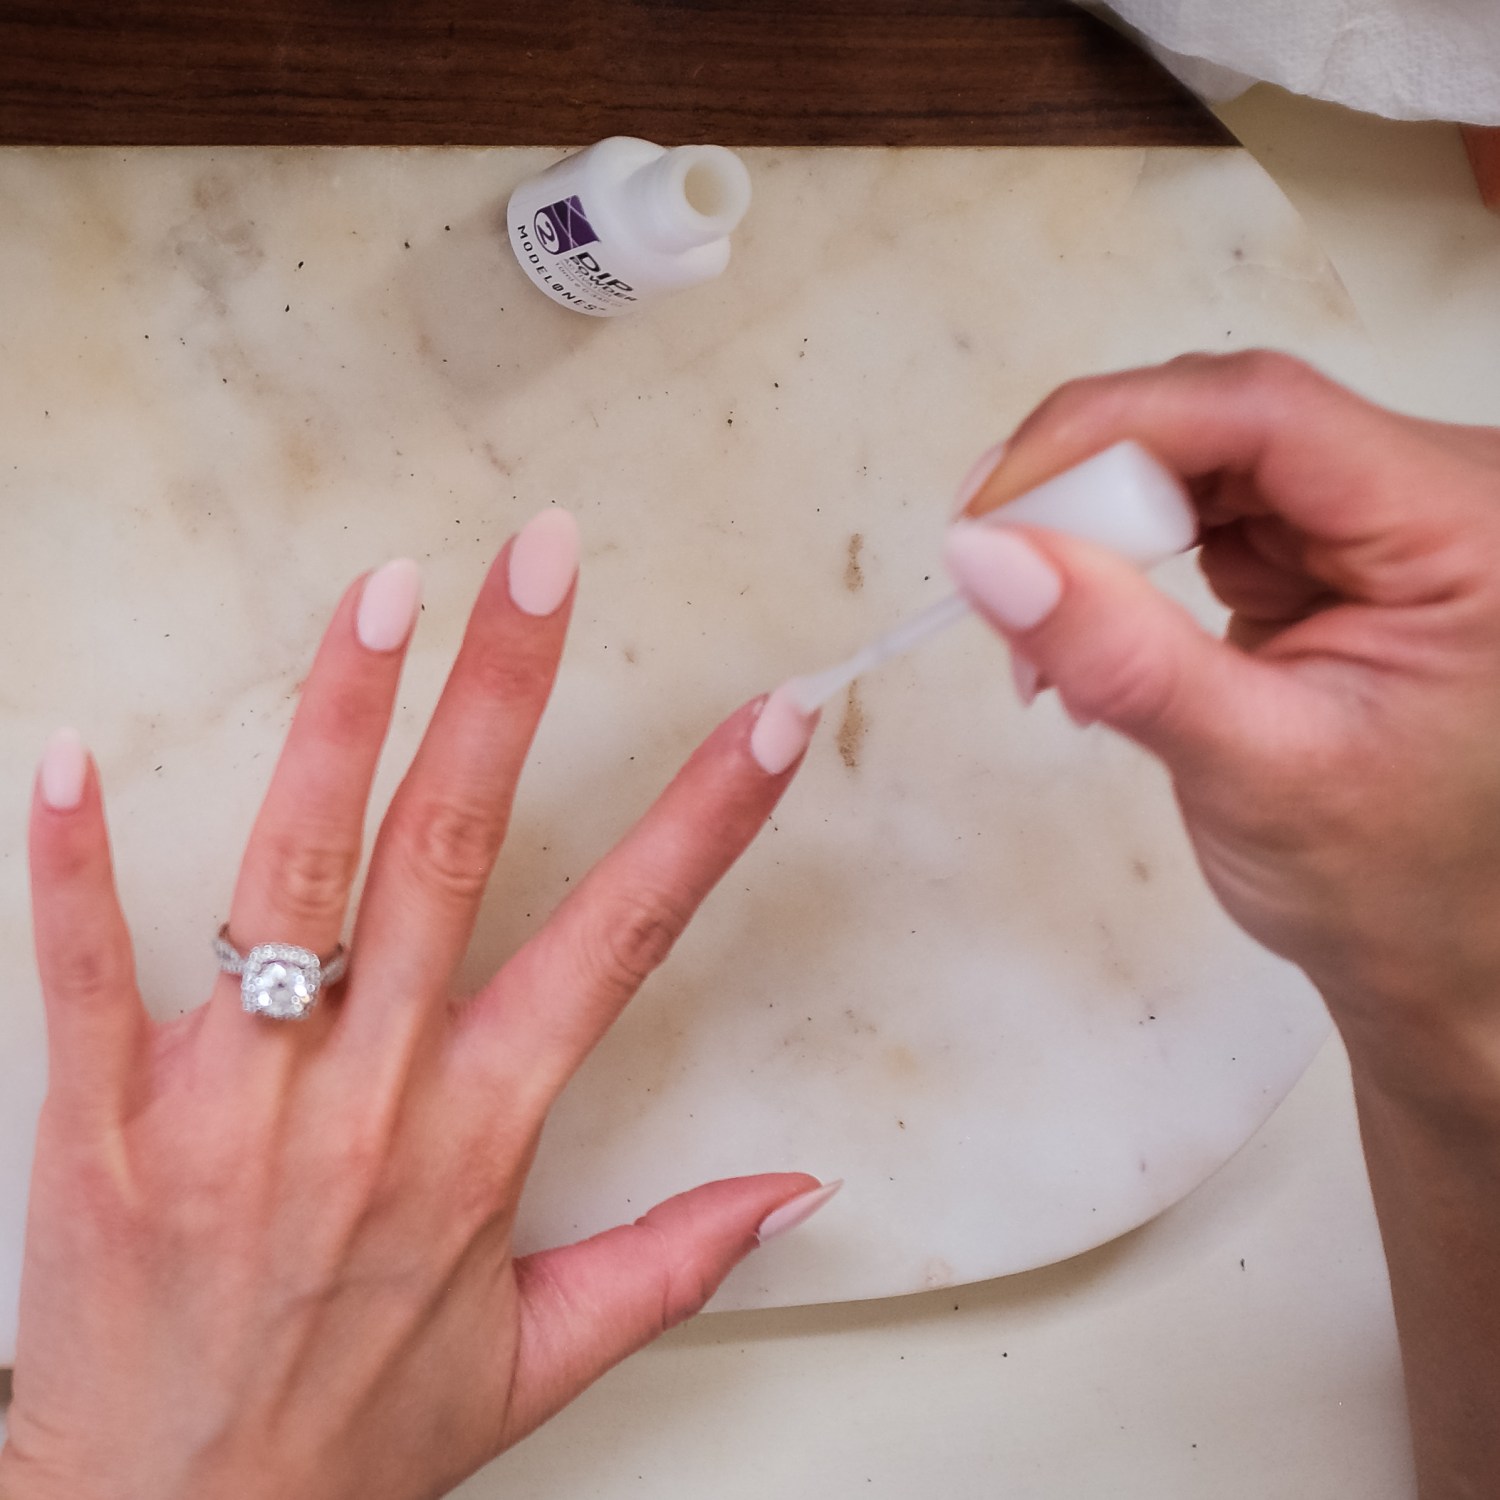
3. Dip: Base coat then dip into clear powder. My favorite part!


Then pull your finger straight out. You can take your other hand to tap lightly on this finger to remove the excess powder right over the jar.

Some quick tips:
- The base coat dries fast, so have your powder ready to go before you start. You want to coat no more than 2-3 fingers at a time. Then dip them right into the powder.
- I suggest doing your nails over a non-porous flat surface. I’m using marble tray here, so it’s easy to clean up afterwards with all the fly away powder. If you do it on a couch or a bed, make sure to use a flat tray to catch any fly away product!
- Work one hand at a time from start to finish. I usually do my left hand first, finish all the steps. Then I work on my right hand.
4. Dip: Base coat then dip into color powder of choice. x2

The repeat this step for another coat.
At the end, you should have 1 coat of clear coat, and 2 coats of color powder.
4. Apply the Activator
5. Shape and buff your nails

The powder might have changed the shape of your nails. So use a nail file to fix the shape.

If the powder feels too thick, you could buff a little more to thin it out. Make sure to buff evenly, and not working too long on one spot as it may make your nail look uneven.
6. Apply Top Coat. x2

Then apply another coat. Wait for it to dry for ~2-3 min.
And you’re all done! Enjoy your new dip powder manicure.
How to take off your gel/dip powder nails
This is the easiest way I’ve found to take off your gel/dip powder nails. This helps you prepare for a new manicure, or remove any previous old manicure.
1. Buff down the thickness of your gel/dip powder

2. Make a foil wrap for your nails with acetone and some cotton


You can now sit back and relax for ~15 minutes. The acetone will thin the powder or gel from your nails.
3. After 15 min, remove the foil and use the piece of cotton to wipe off the gel/powder.

Troubleshoot: If you open the foil, and the powder/gel is still hard and doesn’t want to come off, you need to soak a little longer. So add a little bit more cotton if you need to, pour 1-2 more drops of acetone, and wrap the foil back up. Wait for a 3-5 more minutes and try again.
Hope this tutorial was helpful. Some of the images were blurry because I used a tripod and a timer, and it was hard to focus the camera that way.
I understand the kit is little bit on the expensive side. However I did some math that if it costs me $40 (+ tip) to get a dip powder manicure at the salon, I just need to do my own nails 2 times at home and will have already made my money back.
My nails look so shiny and amazing. The hard powder layer helps my nails stay strong and not break in the dry weather of Colorado. It’s been weeks and my nails still look good as new (just grown out long). I love how easy it is to do too. It may take some time and is a tedious job. But the technique is simple and the final product is so satisfying.

Would you try doing DIY Dip Powder Nails at home? Which color would you do?
Shop This Post


Holy cow your nails look fantastic! What a great, and helpful tutorial. I have never gotten dip nails, but I’m very intrigued. Plus, I’m a huge fan of ways to save money!
They turned out so great! Though, I have a feeling if I tried this at home I’d have it everywhere but my nails! I have a hard time painting my nails with regular polish and not making it a disaster. Kudos to you!
Like!! Thank you for publishing this awesome article.
Your nails look beautiful! I’ve always been curious about a dip manicure! Love that you can do it at home! Thank you for sharing your tutorial!
Jill – Doused in Pink
Your nails look beautiful, and I’m loving that color! What a nice thing to be able to do at home. It definitely seems like the kit would be worth it if it’s something done with even a little bit of consistency. Thanks for sharing!
Kathryn • simplykk.com
Oh they look so pretty, and feminine! Your ring is gorgeous xo
Gemma | Makeup Muddle